Painting a room can be one of the most effective ways to refresh a home without making major structural changes. However, achieving professional-looking results requires more than opening a can of paint and grabbing a roller. Proper preparation, accurate material estimates, and an organized process can help you avoid wasted time, unnecessary messes, and excess paint. Whether you are updating one bedroom or preparing your home for sale, the right approach can make the project much more manageable.
Start With Thorough Preparation
The preparation stage can have a major impact on the final result. Before opening a paint can, remove furniture from the room or move it toward the center and cover it with drop cloths. Remove wall decorations, switch plates, and outlet covers when possible. Cover flooring carefully to protect it from drips and splatters.
Next, inspect the walls for nail holes, cracks, dents, or other imperfections. Fill holes with an appropriate patching compound and allow the material to dry before sanding the area smooth. Cleaning the walls may also be necessary, particularly in kitchens, bathrooms, entryways, and other areas where dirt or grease can build up.
Do not rush through this step. According to Homeguide, painting an average room can take 6 to 10 hours when the entire process is considered, including preparation, cutting in, painting, and cleanup. Planning enough time for each stage can help you avoid rushing through important preparation work.
Calculate How Much Paint You Need
Buying too little paint can interrupt a project, while buying significantly more than necessary can lead to unnecessary expense and leftover product. Before heading to the store, measure the walls you plan to paint. Multiply the length of each wall by its height to estimate the surface area, then subtract the area of large windows and doors if appropriate.
Paint coverage varies based on the product, wall texture, color, and the number of coats required. According to Forbes, usually one gallon of paint typically covers approximately 350 square feet of wall space.
You may need additional paint if the existing wall color is dramatically different from the new color, if the surface is porous, or if you are painting over stains. Primer may also be appropriate in certain situations. When purchasing paint, consider buying enough for the full project at one time so that the color and finish remain consistent.
Choose the Right Tools for the Job
Professional-looking results depend partly on using the right tools. A quality roller can help provide more even coverage across large wall surfaces, while an angled brush can make cutting in around corners, trim, windows, and ceilings easier.
The roller nap should match the texture of the wall. Smooth surfaces generally require a shorter nap, while textured surfaces may need a thicker one to reach into uneven areas. A sturdy paint tray, extension pole, painter’s tape, drop cloths, and a small container for touch-ups can also make the process more efficient.
Avoid choosing tools based solely on the lowest price. Poor-quality brushes and rollers can shed fibers, leave uneven coverage, or make the work take longer. Investing in appropriate equipment can help reduce frustration and improve the final appearance.
Work in an Organized Order
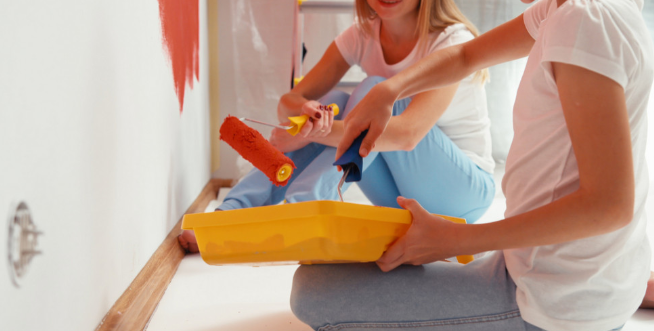
A consistent painting process can help you work more efficiently. Begin by cutting in around the edges of the walls with a brush. Then use a roller to cover the larger sections while the brushed areas are still workable. This can help create a more uniform appearance between the brushed and rolled sections.
Work in manageable sections and maintain a wet edge whenever possible. This helps reduce visible overlap marks as the paint dries. Avoid applying excessive pressure to the roller, as this can create uneven coverage and may cause splattering.
Allow each coat to dry according to the manufacturer’s instructions before applying another. Painting too soon can affect the finish and potentially pull up partially dried paint. While it may be tempting to rush the process, patience between coats can make a significant difference in the final result.
Consider Painting Before Selling Your Home
A fresh coat of paint can also be a practical improvement for homeowners preparing to list a property. Walls with scuffs, bold colors, or visible wear may distract potential buyers from the home’s other features. Neutral, well-maintained walls can help create a cleaner and more move-in-ready appearance.
According to the National Association of Realtors, 63% of real estate agents recommend painting interior walls before selling a home. While painting cannot guarantee a specific sale price or outcome, addressing worn or outdated walls may help improve the property’s overall presentation.
Homeowners preparing to sell should focus on visible areas that show the most wear. Entryways, living rooms, kitchens, hallways, and other frequently used spaces may benefit from attention before listing photos and showings.
Finish With Careful Cleanup
Cleanup is an important part of completing a painting project. Remove painter’s tape carefully, ideally before the paint has fully hardened, to help create cleaner edges. Clean reusable brushes and rollers according to the paint manufacturer’s recommendations, and properly seal leftover paint for future touch-ups.
Inspect the walls once the paint has dried. Small imperfections, missed spots, or minor drips may be easier to identify in good lighting. Addressing these issues before putting away all your supplies can save time later.
Create Professional Results With Better Planning
Painting a room like a professional is largely about preparation and organization. By protecting the room, estimating paint needs carefully, choosing the right tools, working methodically, and allowing adequate drying time, you can avoid many of the common problems associated with interior painting.
A well-planned project can transform a room while minimizing wasted materials and unnecessary effort. Whether you are refreshing your current living space or preparing your home for the market, careful painting techniques can help you achieve a cleaner, more polished result.